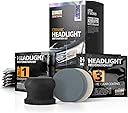
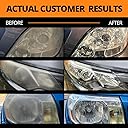
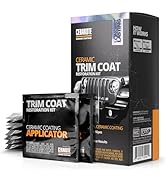
I do have before and after pictures, but I'm too lazy to upload them. Trust me when I say that the difference is DRAMATIC. It's as if I have brand new headlights! I took them from foggy/clouded to crystal clear, without even that much effort. And with the ceramic coating, I expect they will stay that way. Here are some tips from what I learned about using the kit. 1. If you are careful, and you're not doing the lights on a big truck, and the fogging isn't terrible, you can split the supplies in half and have enough left over to do another car! 2. It's not a bad idea to tape off the headlights through steps 1 and 2 (initial chemical cleaning, and especially, sanding). Even though I did this, I still managed to sand off a thin line of paint right next to one of the headlights. That was entirely my fault. 3. You can't really sand too much. I actually did it twice. Instead of going by the clock (they say 3 minutes per pad), I just told myself I would use the applicator twice on each piece of sandpaper, and then take off the sandpaper to sand by hand a third time. In other words, three passes with each grit, for a total of six passes per light. That worked out well, and it wasn't too hard, either. Just be careful you don't sand the paint on your car! 4. Bring a roll of paper towels with you before you start. I spent a lot of time running back and forth to the house. You won't need the whole roll. I used about ten towels, total. So bring a roll, and save yourself some time. 5. Make sure you set aside an hour to do the job, and another hour to let it cure. That's about how long it took me, and I'd never done it before. I believe I can do it again in under 45 minutes, easily. But you'll still need an hour for the final coating to cure. If it's raining, you won't be able to do this work. Also, you should work in the shade. I don't think it would come out very well if you do it in direct sunlight. 6. You will definitely need a spray bottle, filled with water. A 16 oz bottle would be about right. I used a little tiny 2 oz bottle, and had to refill it numerous times. 7. When they say to keep the surface of the headlight WET while you sand, they mean it! Your work will come out much smoother, and go faster, if you do that. If not, you end up with a gunky mess that you will have to clean off anyway, and probably have to sand some more - so why not spray while you go? 8. Be sure to use those paper towels to clean things around the lights very well between each step. It just makes the job easier when you don't have to worry about ruining your paint with the chemicals, and you get all the sanding glop out of the way, so you can see if you are sanding your paint, and not your headlights! 9. Be sure to REMOVE THE TAPE before you begin step 3 (ceramic coating). Then, use a hair dryer to THOROUGHLY dry out the surfaces around the lights (and the lights themselves) before you start coating the headlights. This last step 3 is crucial to performance, and is why this kit is so special. It takes no time at all to do the work, like rubbing alcohol once on the headlight surface. But the chemical isn't alcohol, and it's very strong, so prepare well - you don't want to have to stop in the middle of the application. Dry out those lights and surfaces first (because the chemical coating does not play well with water, at all)! Then know that putting on that coating only takes about 15 seconds per light. You just coat it once, with 50% overlap, wipe off any of the chemical that's dribbled onto your paint, and then DON'T TOUCH THOSE HEADLIGHTS FOR ONE HOUR! Let them cure, and they will be like-new! Again, this kit is marvelous. If I had known the end result would be so amazing, I would have taken it out of the box much sooner. I am going to do my wife's car next. It really is the best thing I've seen to do this job. Somebody put a lot of thought into this product, and you can tell. Not too much work for an absolutely fantastic end result!